Story
Have you ever questioned why everyone finds sleeping in a hammock to be so wonderful, but when You use it, in the morning it hurts everywhere and doesn’t feel good at all? Sleeping on a hammock is a complex sport that takes some preparation before you can enjoy a good night’s sleep.
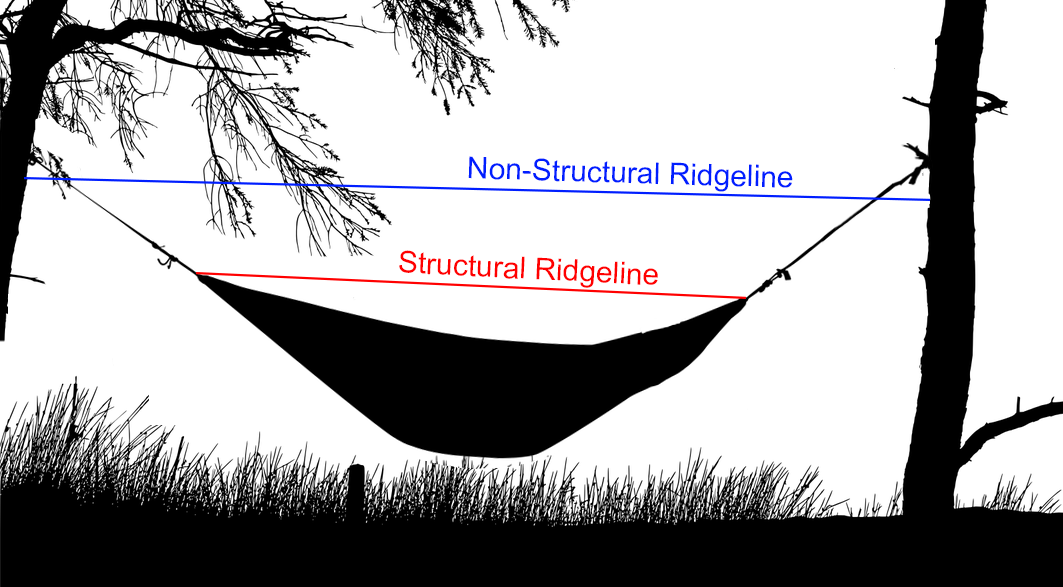
People frequently mention that sleeping in a banana-shaped position (legs and head higher than the torso) causes back and leg pain, which is true. The trick is that the hammock is designed to be slept in a little asymmetrical manner rather than in a straight line. And this is where the Structural Ridgeline comes in handy.
In this article, I will tell what is a structural ridgeline and how to build one for your hammock.
Structural Ridgeline
The structural ridgeline for a hammock is a rope attached between the two ends of the hammock that establishes and maintains the hammock’s sag and curve when hanging. It helps to ensure that the hammock hangs consistently, regardless of the distance between trees or other anchor points. A structural ridgeline also provides a place to hang objects such as tarps, mosquito net, lights, and other helpful equipment.
There are a couple of different kinds of ridgelines. One that is attached to the hammock (Structural Ridgeline) and one that is attached to the trees (Non-Structural Ridgeline, tarp ridgeline). In this articl, we are building a fixed structural ridgeline that is attached straight to the hammock, and its main purpose is to shape the hammock to the right angle so that sleeping asymmetrically is possible.
Building Structural Ridgeline
Building a structural ridgeline for a hammock is quite an easy task. You need only a few things:
- Rope
- Measuring tape
- Something sharp to cut the rope
- 10 minutes of your time
Rope Material
The rope must be strong and inflexible. Ropes made from Amsteel or Dyneema are ideal for this use. The thickness should be in the order of a few millimeters. 2.5 - 4mm is good.
The length of the rope should be about 83% of the length of the hammock. This is a general guideline, and your comfort might dictate a different length. Frankly, I am not sure where the 83% comes from, but it seems to be a good starting point. You can always adjust the length later.
83% translates to centimeters as follows (common hammock models):
- Ticket To The Moon Original Hammock (320cm) = 266cm
- Ticket To The Moon Single Hammock (320cm) = 266cm
- Ticket To The Moon Double Hammock (320cm) = 266cm
- Ticket To The Moon Lightest Hammock (310cm) = 257cm
- Ticket To The Moon Lightest Pro Hammock (325cm) = 270cm
- DD Hammocks SuperLight Hammock (270cm) = 224cm
- ENO SingleNest Hammock (290cm) = 241cm
- ENO Sub6 Ultralight Hammock (270) = 225cm
The easiest way is to take your own hammock and measure its length with a tape measure and then do the math, length * 0.83 = ridgeline length.
Buying a Rope
- Varusteleka - Finnish outdoor store
- Amazon - Amazon
Attaching the Rope to the Hammock
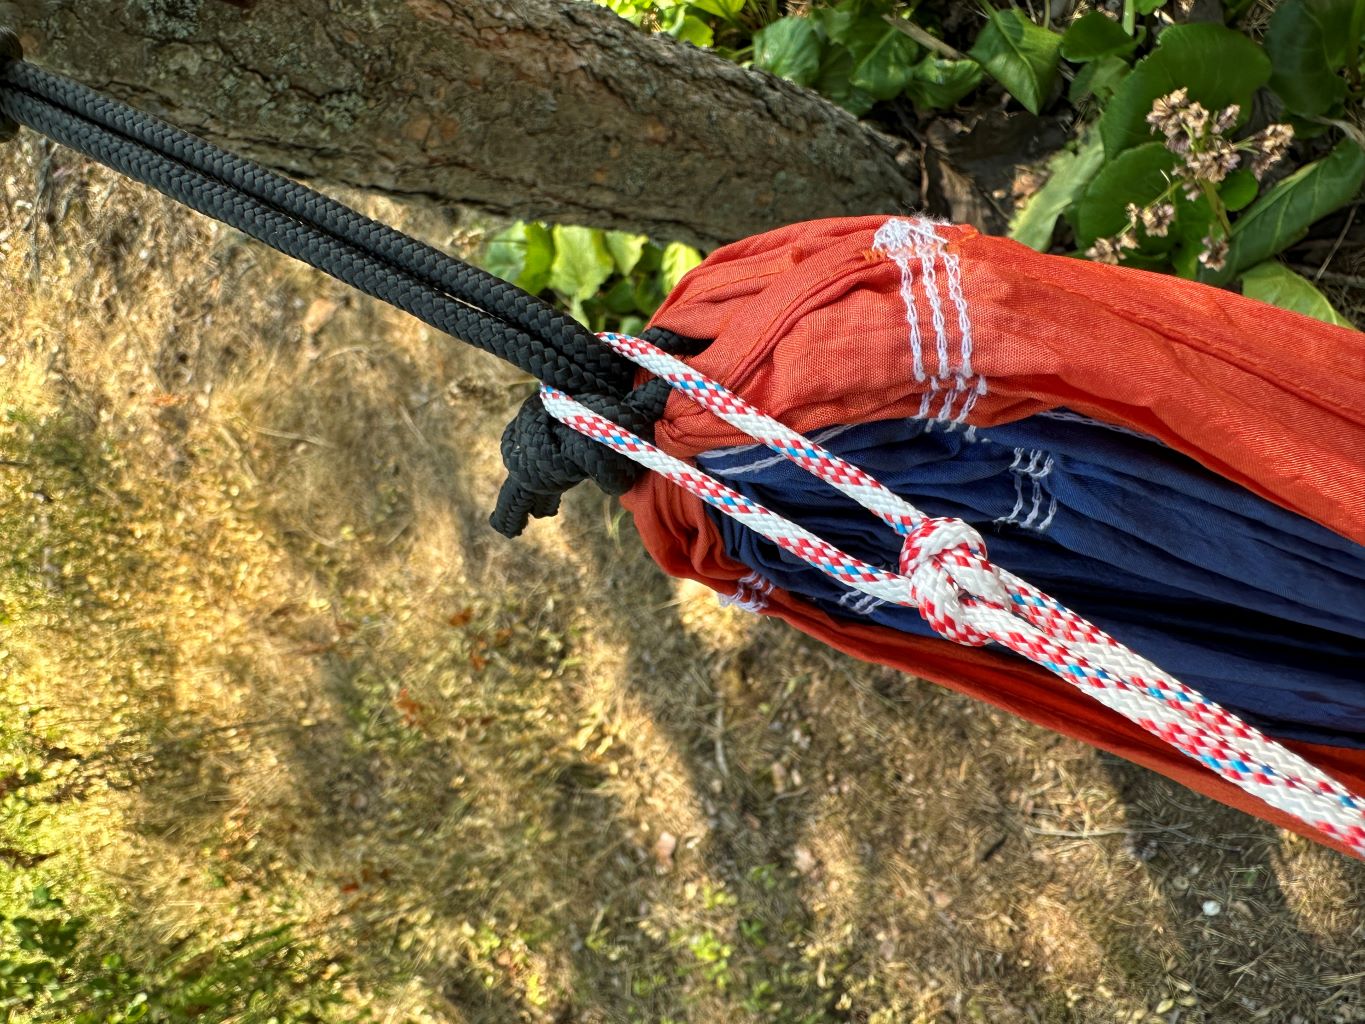
There are a few possibilities. Either the rope is permanently attached to the hammock, which makes it a little more difficult to adjust afterward, but ensures that the rope always stays with you. Or the line is detached and only attached to the hammock during assembly. This is a little more difficult to assemble, but it is easier to adjust the length of the line later. Or it’s a combination of both, where the line is permanently attached to one end of the hammock, but it is detachable from the other end.
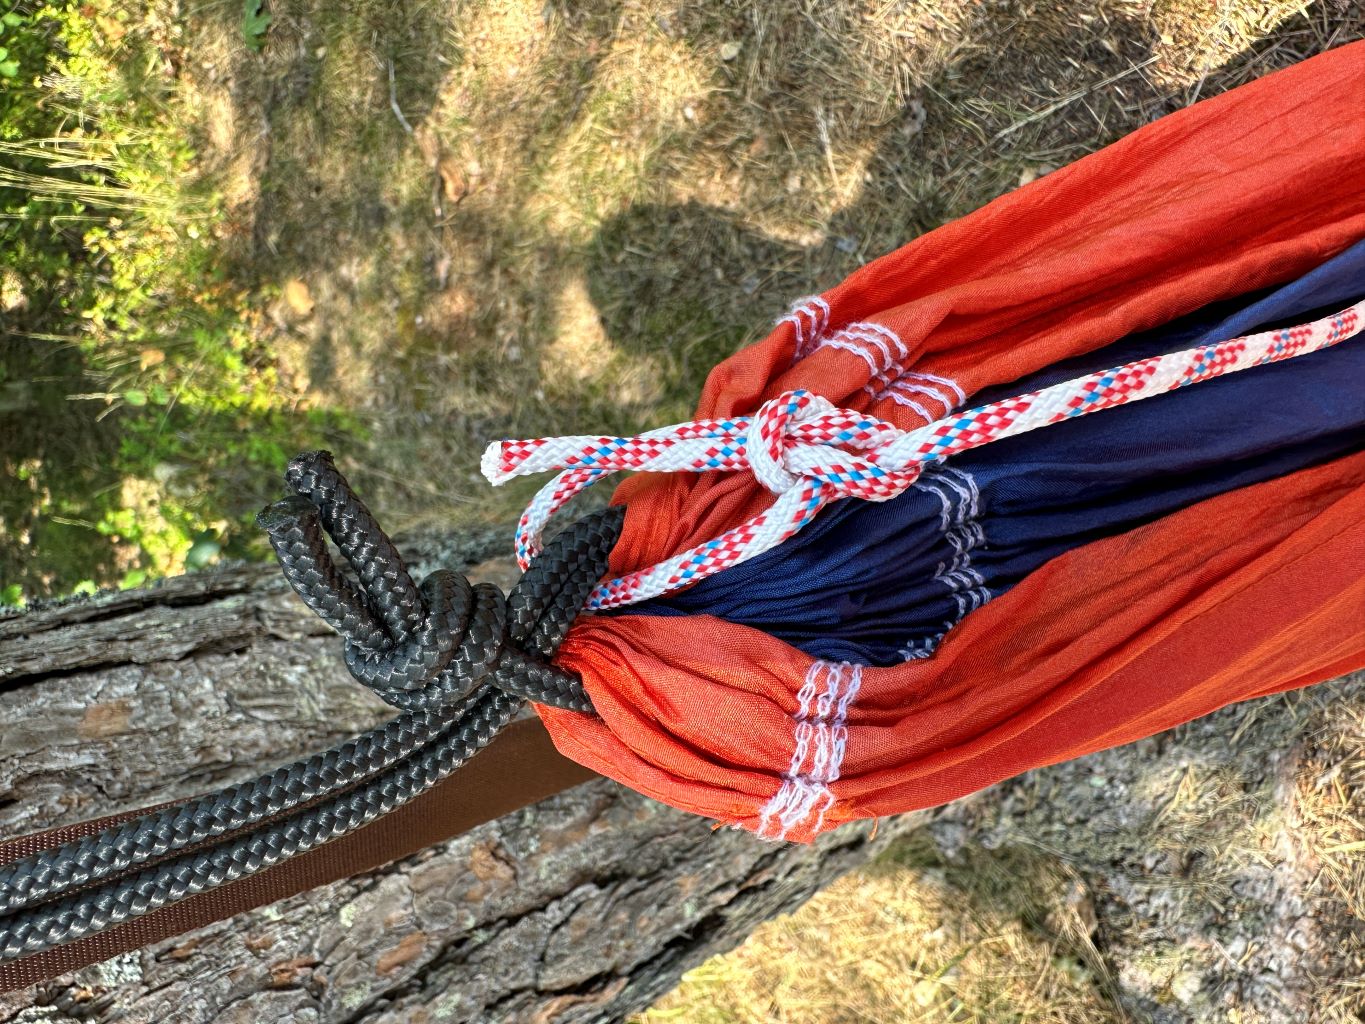
But anyway, you need to create bowline knot at least to one end of the rope. This is the knot that is used to attach the rope to the hammock. The bowline knot is very strong and easy to tie. It is also easy to untie after the rope has been under tension for a long time.
If the ridgeline is attached permanently to the hammock, you can use the same knot to attach the other end of the rope to the hammock. If the ridgeline is detached, you need to use some other knots to attach the other end of the rope to the hammock. The knot should be easy to tie and untie, but it should not come loose by itself.
One option is that you can splice the rope, but that is a little more difficult and requires some skill. I will not go into that in this article.
Step-by-step Guide
My preferred method, one end permanently attached to the hammock and another end detachable.
Measure your hammock: The length of your ridgeline should be about 83% of the length of your hammock. Measure your hammock’s length while it’s not under tension.
Cutting the rope: Using your measurements from step 1, cut the rope. However, remember to add an extra meter for the knots you’ll need to make. It’s always better to have more rope than you need, as you can trim the excess later.
Attach the rope to the hammock: One method is to use a bowline knot on one end and keep the other end loose.
Create the ridgeline: Stretch the rope to the other end of the hammock, ensuring it’s tight but not overly straining. Attach the other end of the rope to the other end of the hammock, or as said previously, create just a bowline knot.
Adjust the ridgeline: Lie in the hammock and test the ridgeline. It should maintain the hammock’s sag but not be overly taut or loose. If necessary, adjust the ridgeline by untying and retying the knots at one or both ends of the hammock.
Trim the rope: Once you’re satisfied with your ridgeline, trim any excess Dyneema.
Final Product
The hammock is Ticket To The Moon Original Hammock (320cm) and the ridgeline is ~265cm long. The ridgeline is permanently attached to the hammock with a bowline knot on the other end and loose on the other. There are also a couple of strings with prusik knots attached to the ridgeline. These are used to hang items to the ridgeline.
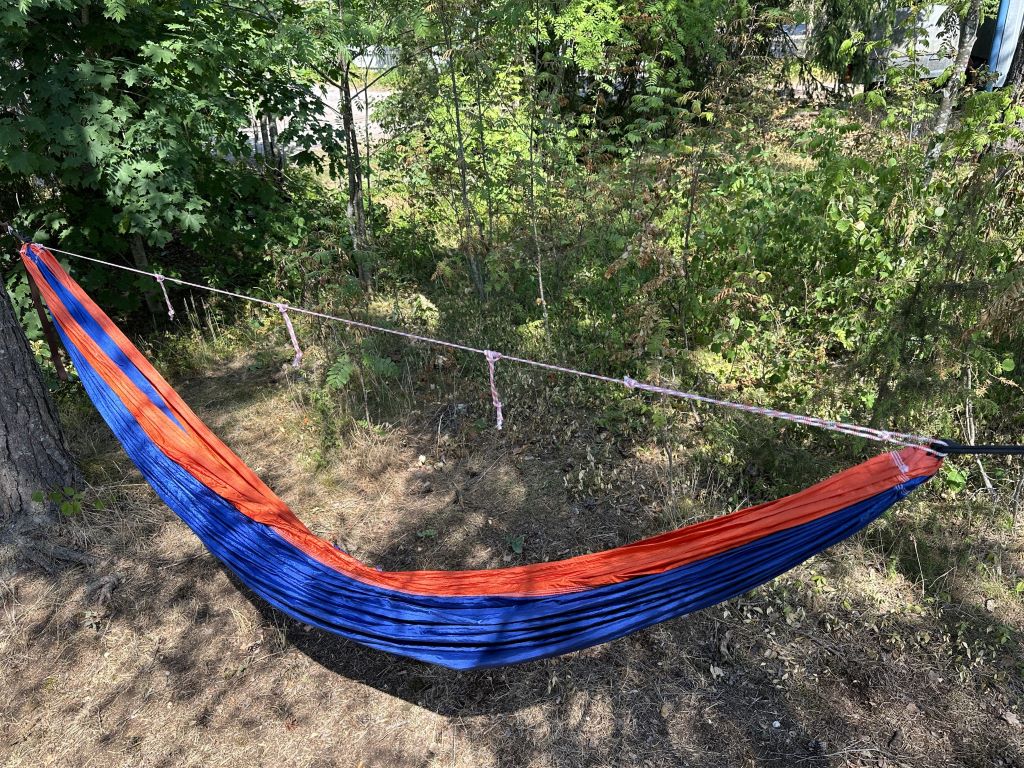
(The hammock itself is not quite in the right position. I hung it quickly in our yard just to take pictures.)
Additional Information
To hang items to the ridgeline, you can use a string with Prusik knot, or use carabiners. You can also use a Ridgeline organizer to hang and store items.