This article may have been about running Splunk Enterprise in a Docker container, but it is actually about sending logs from Docker containers to Splunk Enterprise on-premises or Cloud deployments.
By default, Docker logs JSON-formatted data to the filesystem. This is adequate for simpler systems, but log management (and viewing) becomes less practicable for more complex ones. Sending Docker log direct to the Splunk SIEM system is one technique to make things easier for the admins.
Docker is also compatible with additional logging drivers. Such as GELF, Fluentd, AWSlogs, and Syslog. For further details on these choices, consult the Docker documentation.
This guide has been tested on Ubuntu 22.04 and this should work on different Linux distributions, but file paths may vary.
Prerequisites
I’m going to assume that you already have a functioning Splunk installation that is more recent than version 6.6. Just prior to that release, Splunk introduced HTTP Event Collector (HEC), a new token-based JSON API for events. In plain english that means that you can send JSON formatted logs to Splunk REST API and authentication is handled by tokens., which are provided in HTTP request headers. Splunk version 6.6 or later is required for the Splunk logging plugin, which will be installed later. The version of Docker Community Edition (Docker-ce) must be more recent than 18.03.
One can use curl, for example, to check that the Splunk HEC endpoint is operational
1curl -k "https://SPLUNK-SERVER:8088/services/collector/health"
2
3# Response should be something like this
4
5{"text":"HEC is healthy","code":17}
Creating a new HEC Token for Docker
A new HEC token must be created, indexes must be defined, and source types must be specified before Docker can submit logs to Splunk. The Splunk UI makes it simple to create new tokens.
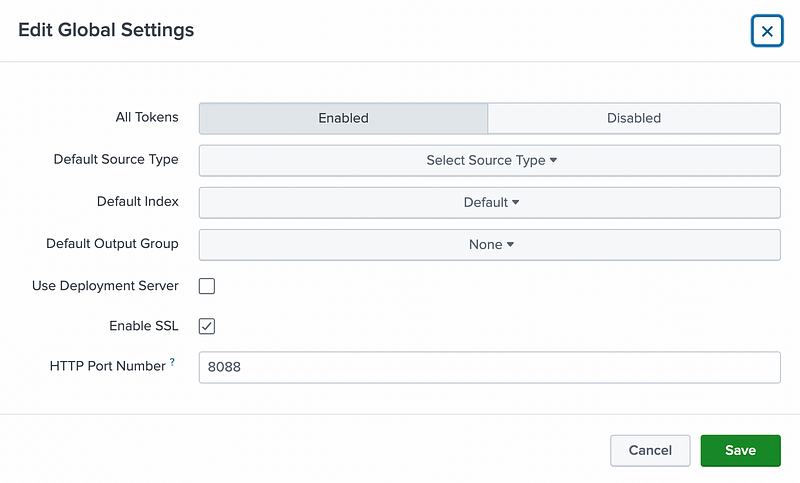
Make sure that HEC is enabled
Settings → Data Input → HTTP Event Collector → Global Settings All Tokens**: Enabled** HTTP Port Number**: 8088**
Create new token
Settings → Data Input → HTTP Event Collector → New Token
Name: Docker

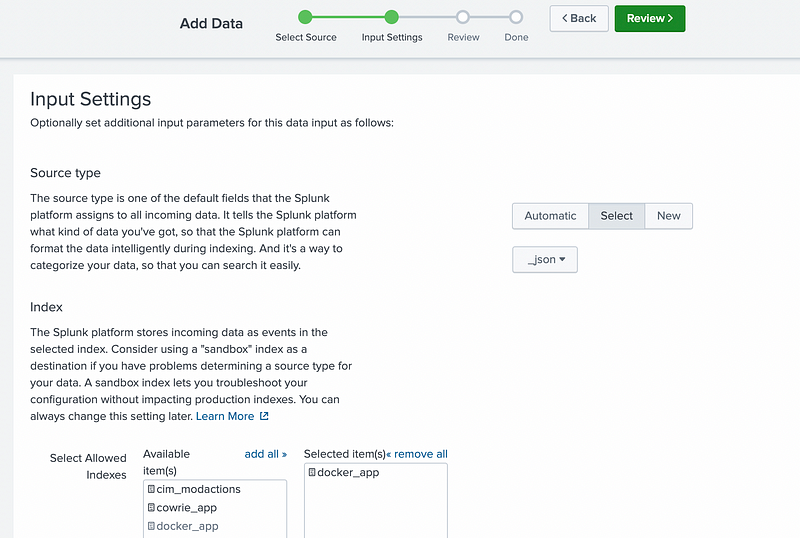
Select Index and Source type. I have previously created index called “docker_app”.
Source type: Select → _json
Index: docker_app
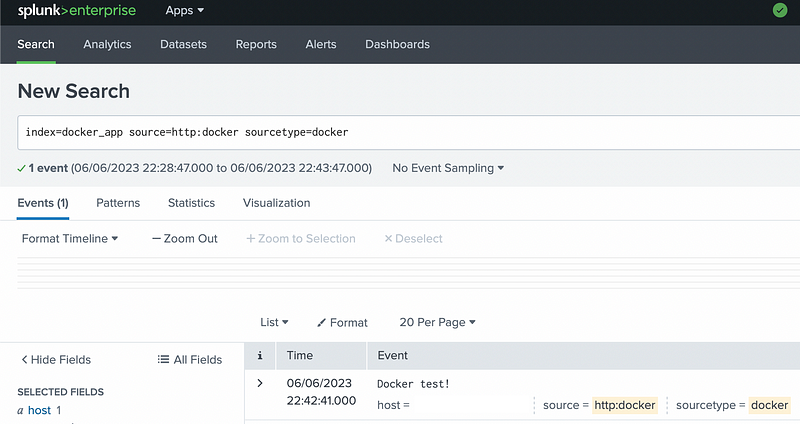
Now that a new token has been created one can test that the Splunk is receiving events that are sent to the HEC endpoint. This can be done with curl
1curl -k https://192.168.99.210:8088/services/collector -H 'Authorization: Splunk 98e0b278-2f0a-a42a-b92a-00bff2305e2e' \
2-d '{"sourcetype": "docker", "event":"Docker test!"}'
3
4# Response should be something like this
5
6{"text":"Success","code":0}
From Splunk one should see that the event is received and indexed correctly
Installing Splunk plugin for Docker
Splunk loggin plugin is a plugin that extends Docker’s logging capabilities so that entities can send their Docker logs to their Splunk on-premise or cloud deployment.
The plugin can be installed as the Docker engine’s default logging driver or configured for specific containers. This guide will use engine wide configuration.
The simplest method to install the plugin is to use docker cli with command
1$ docker plugin install splunk/docker-logging-plugin:latest --alias splunk-logging-plugin
Next, we must inform the Docker engine that the default logging driver is the newly created splunk-logging-plugin. /etc/docker/daemon.json contains the Docker daemon configuration. Assuming that this file does not exist, it must be created with the following content
 1{
 2  "log-driver": "splunk-logging-plugin",
 3  "log-opts": {
 4    "splunk-url": "https://SPLUNK-SERVER:8088",
 5    "splunk-token": "CREATED-TOKEN-UUID",
 6    "splunk-insecureskipverify": "true",
 7    "splunk-format": "json",
 8    "tag": "{{.ImageName}}/{{.Name}}/{{.ID}}"
 9  }
10}
The splunk-url and splunk-token settings need to be changed. Restart the Docker process after that. Existing containers must be recreated since they do not instantly recognize the updated logging driver configurations.
Everything should now be in order on both sides.
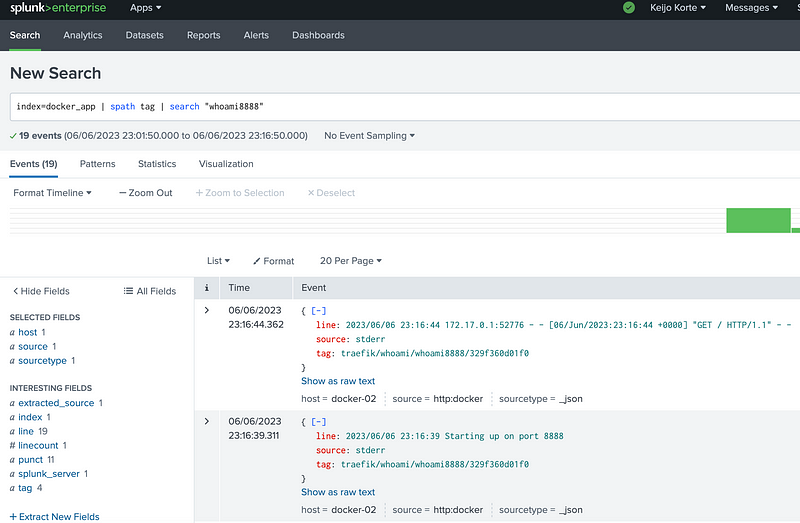
Additional configuration options can be found on plugin documentations. Different tagging options can be found here. This guide uses “{{.ImageName}}/{{.Name}}/{{.ID}}” for tagging and it should be seen on Splunk side like “traefik/whoami/whoami8888/329f360d01f0”.
Bonus — Run single container with the Splunk configuration enabled
In the example below, one can launch a single “traefik/whoami” container with the Splunk logging driver configurations enabled
1$ docker run --name "whoami8888" --rm -p 8888:8888 --log-driver=splunk-logging-plugin\
2             --log-opt splunk-token= 98e0b278-2f0a-a42a-b92a-00bff2305e2e \
3             --log-opt splunk-insecureskipverify=true \
4             --log-opt splunk-url=https://SPLUNK-SERVER:8088 \
5             --log-opt tag="{{.ImageName}}/{{.Name}}/{{.ID}}" \
6             traefik/whoami -port 8888 -verbose
Events viewed from Splunk UI
Congratulations
You have just successfully configured Docker to send log messages to Splunk!